
Deepfake in video conferencing
Introduction
This article explains how one can project a deepfake-ed live video stream of themselves to a meeting on Skype, Zoom, GoogleMeet or any other video calling platform using python, opencv and deepfacelive app running in a docker container. Source code/sample scripts used in this article can be found in this repository.
Solution Overview
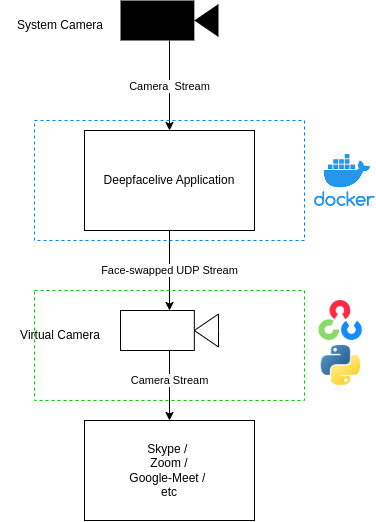
Instructions
- Start the DeepFaceLive app and make it output a UDP stream
- Read the UDP stream and write it to a virtual cam
Start DeepFaceLive app
- Clone the deepfacelive repo
git clone https://github.com/iperov/DeepFaceLive - Add the ‘–network host’ flag to docker run in ‘start.sh’ script to let the container use host network
cd DeepFaceLive/build/linux/ nano start.sh docker run --network host --ipc host --gpus all -e DISPLAY=$DISPLAY -v /tmp/.X11-unix:/tmp/.X11-unix -v $DATA_FOLDER:/data/ $CAM0 $CAM1 $CAM2 $CAM3 --rm -it deepfacelive - Build and start the image for Linux, make sure to pass the ‘-c’ flag to pass host machine cameras to docker
./start.sh -c -
Once the app has started, select the camera by choosing a device number from the dropdown. Usually, your system camera is at 0th index, if it is not try a different number. Once successful, your camera stream should be displayed in the window below.

-
Load a pre-trained face model of a character that you want to swap your face with. Note downloading the model may take some time.
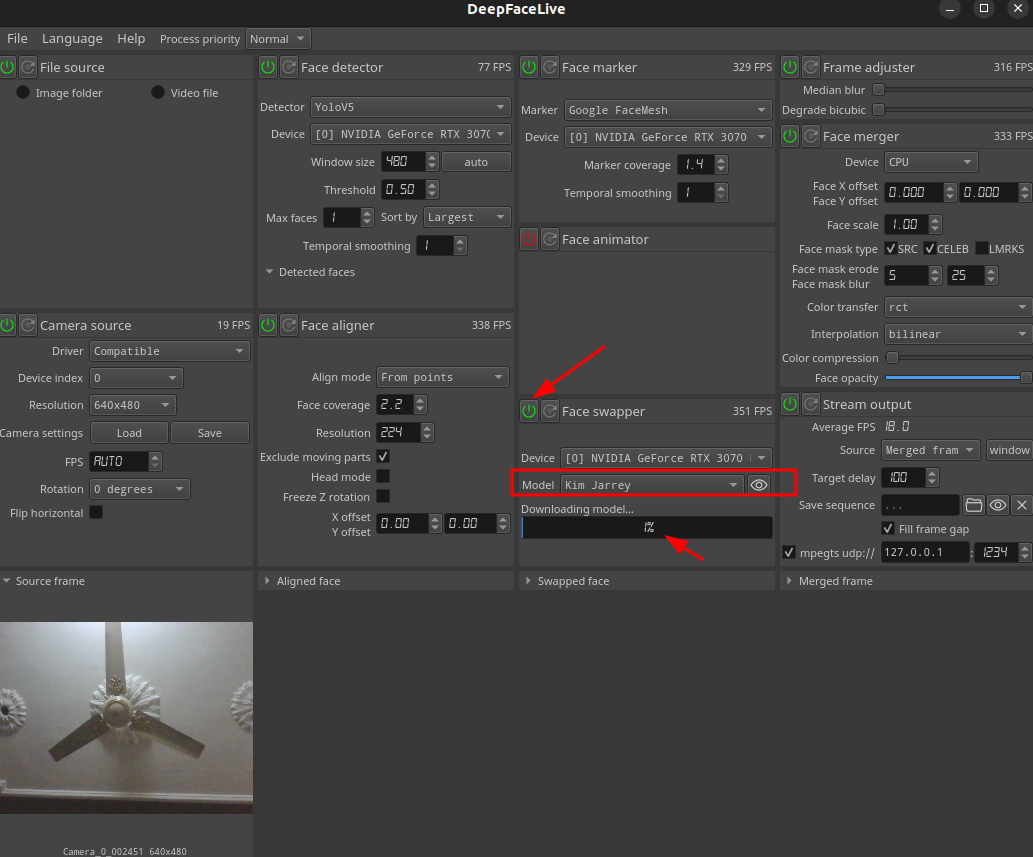
-
Once you can see a swapped result, selected ‘Merged output’ from the drpodown and tick the checkbox to output result as a UDP stream.
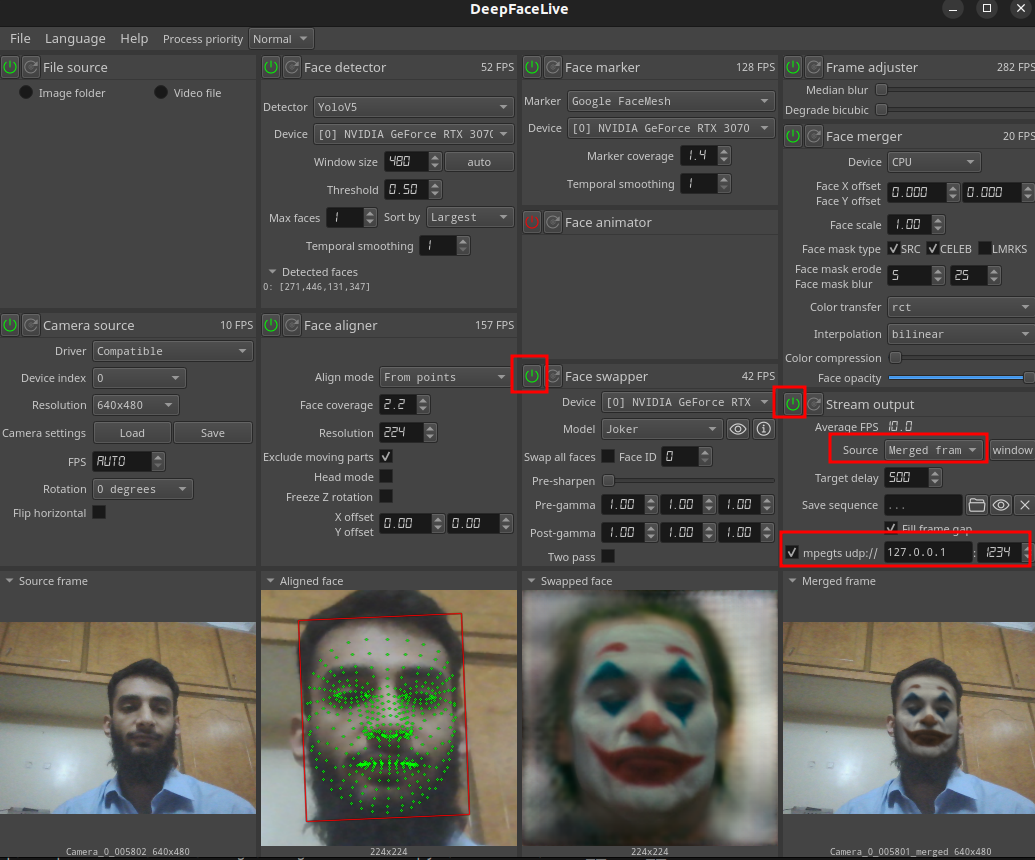
Note the udp address 127.0.0.1:1234, we will use this to read the mpeg transport stream in opencv.
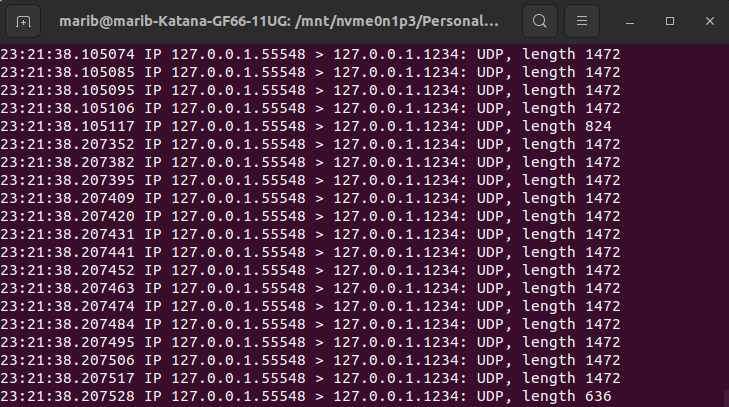
- To verify that output stream is being written to the defined port, open a terminal window and run the following command.
tcpdump -i lo -n udp port 1234The output should look something like below
Start pyvirtualcam
- Clone deepfacelive-virtualcam script:
git clone https://github.com/marib-suItan/deepfacelive-virtualcam cd deepfacelive-virtualcam/ - Create a virtual camera using v4l2loopback and verify its existence.
sudo apt install v4l2loopback-dkms modprobe v4l2loopback video_nr=2 ls -1 /sys/devices/virtual/video4linux - Run the python script
python virtualcam.py -
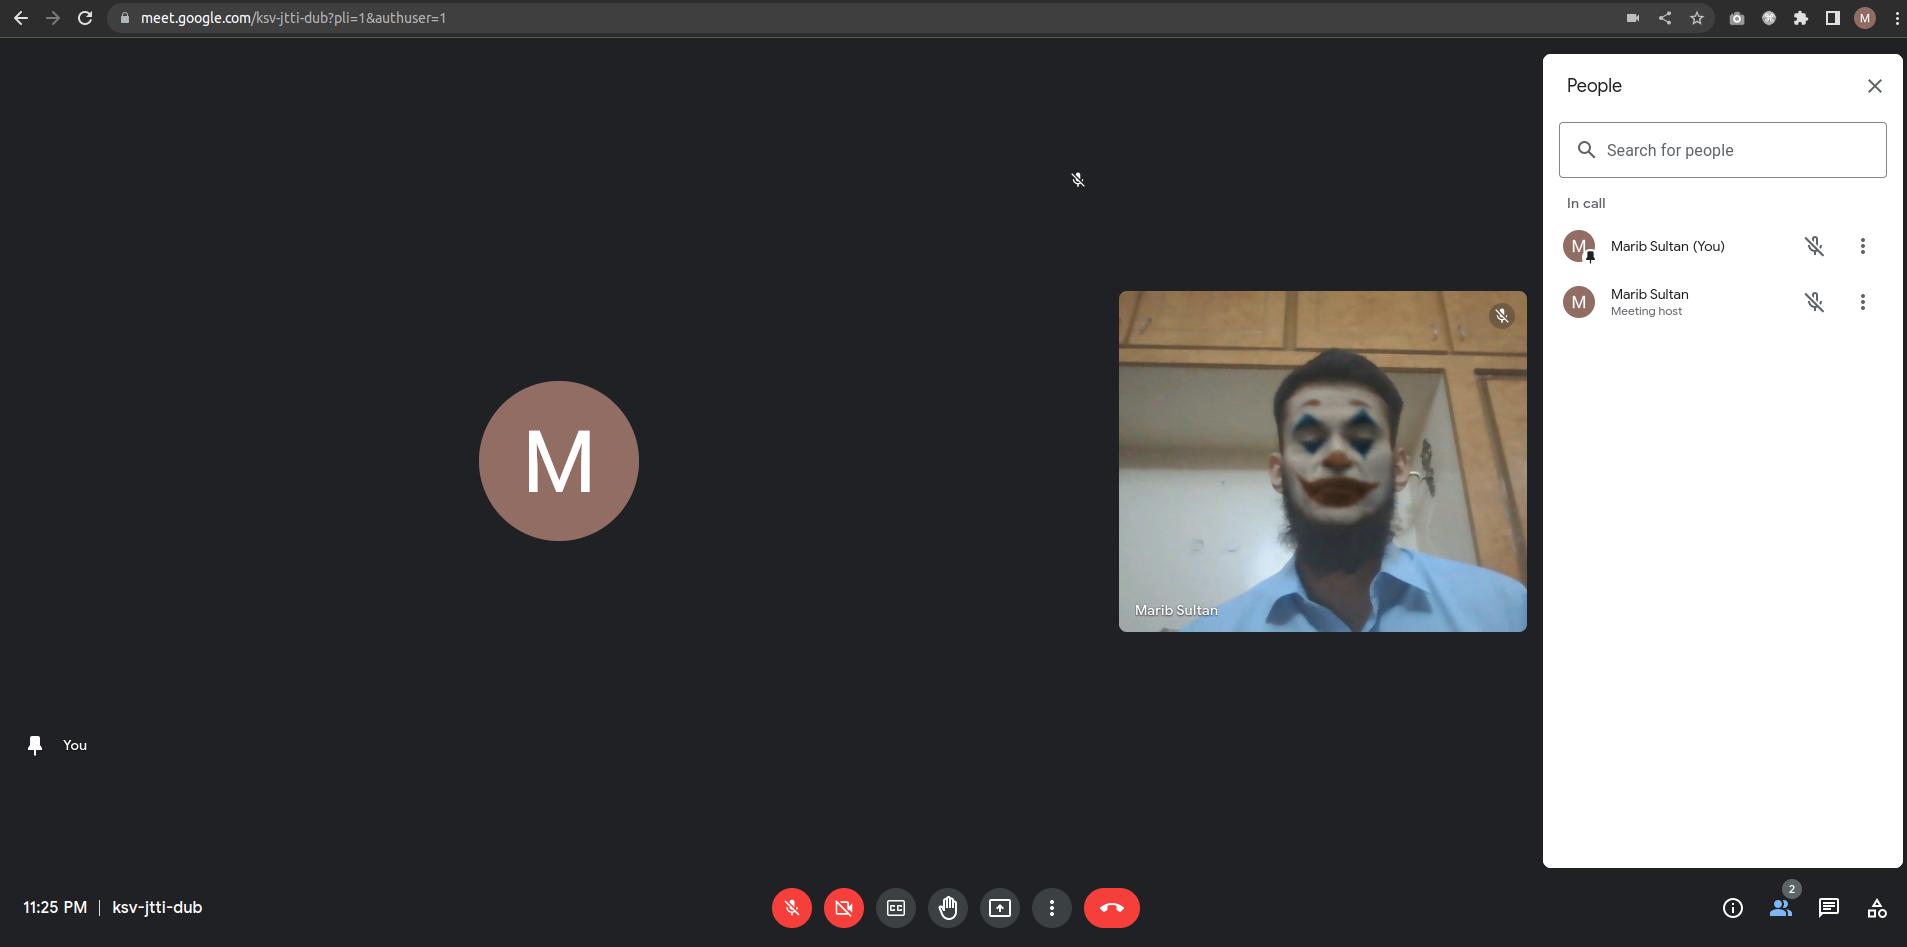
If everything has been successful you should see a dummy cam option alongside your system camera in other applications.
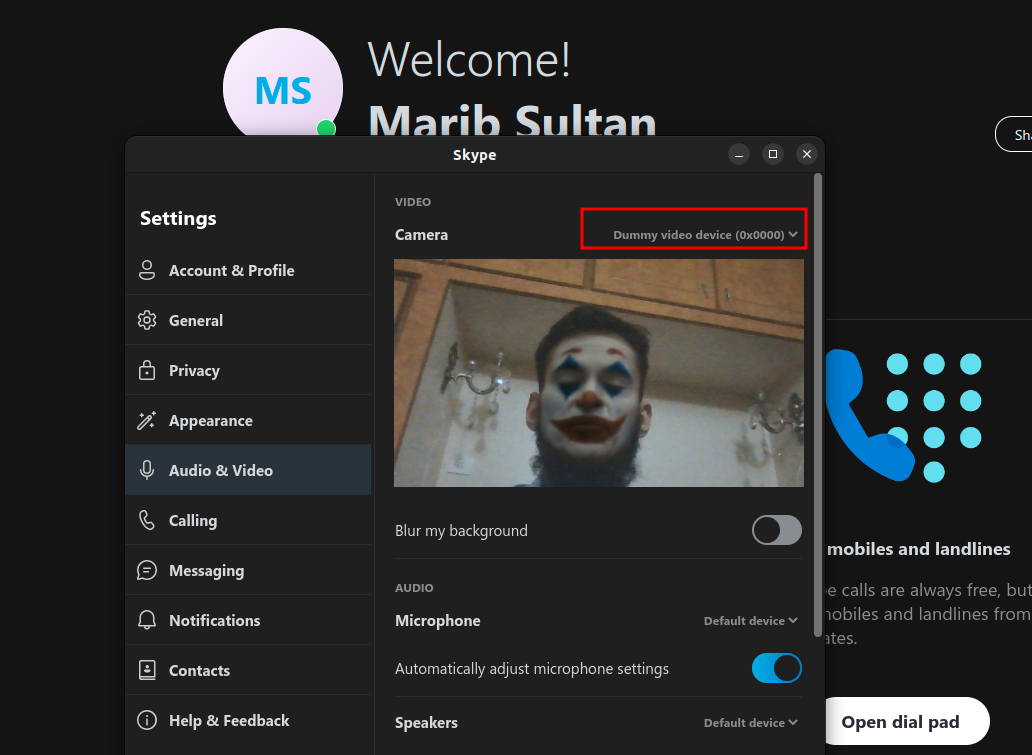
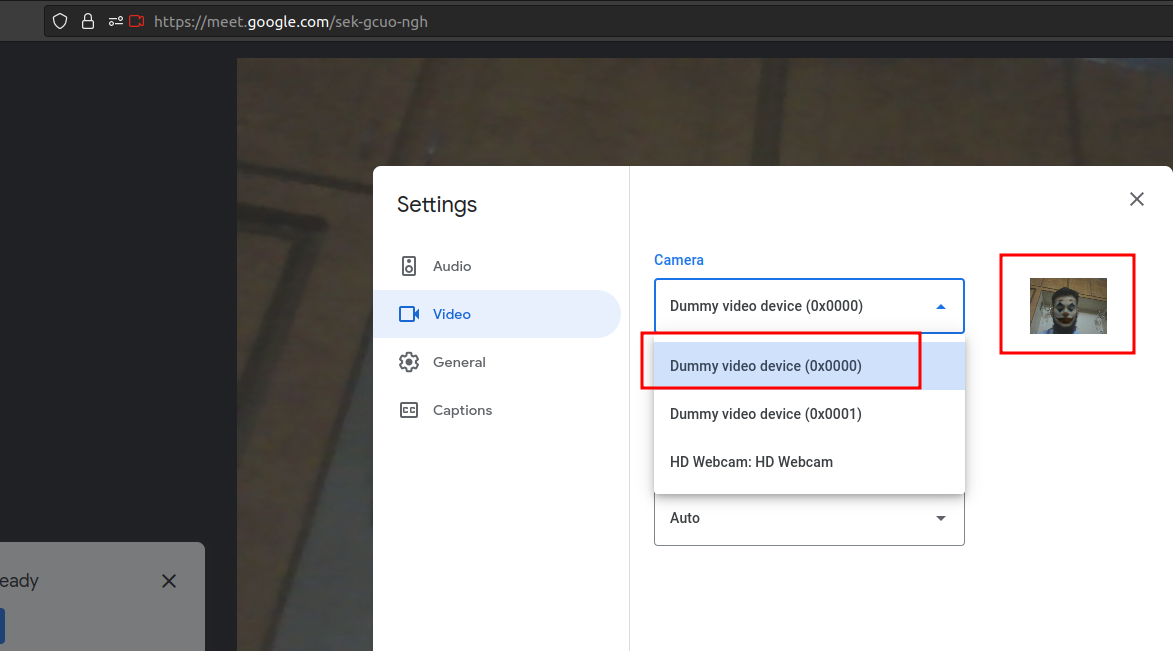
Note Chrome seems to block virtual cameras for some reason, but Firefox, Skype and MSTeams work just fine.